As a starting point of our WISP project, we have designed a small network WISP network architecture and decided to use the following networking devices:
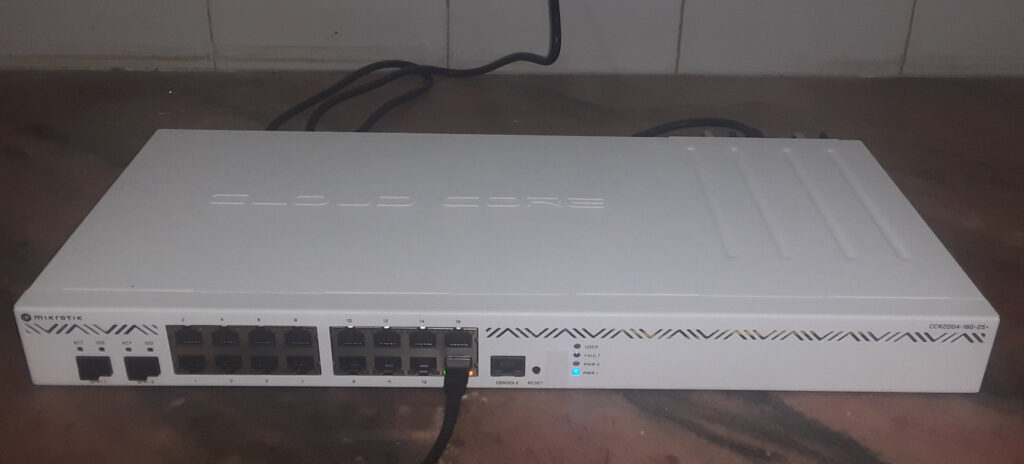
1) Mikrotik Cloud Core Router CCR2004-16G-2S+
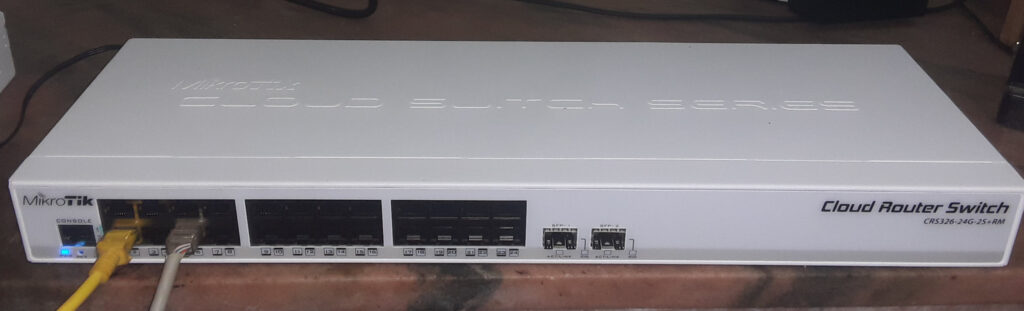
2) Mikrotik Cloud Router Switch CCR2004-16G-2S+
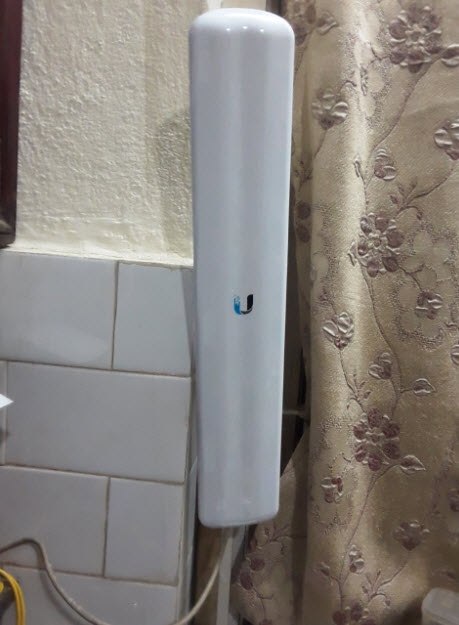
3) Ubiquity LiteAP antenna
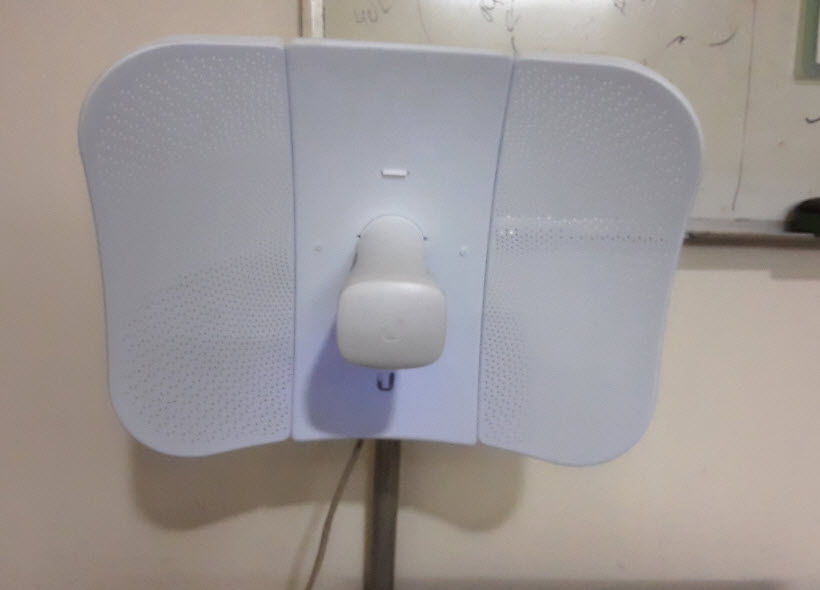
4) Ubiquity LiteBeam AC antenna
5) Ruijie RG-RAP6262(G) WiFi 6 basestation
6) TD-W8961N ADSL2+ Modem Router(just for a LAN switch)
Network Infrastructure
The following shows the WISP network diagram for testing purpose:
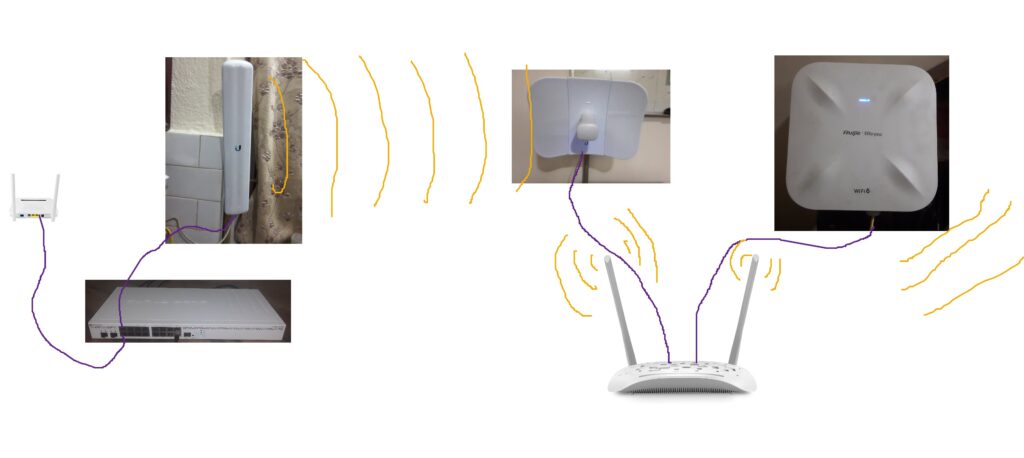
The idea is as follows. The core router will get internet from the internet backbone with some static IP address. For now the internet is provided by FTTH optical router. The internet is connected to the eth0 port of the mikrotik router. Then the LiteAP is connected to the router eth1 interface. Then LiteAP is connected to the LiteBeam AC. The LiteAP is the access point for LiteBeam AC and the link between them is at 5GHz band. Next the LiteBeam is connected to the ordinary switch which in this case is ADSL2+ modem with wifi. Now we can configure the switch to emit WiFi signal. We then connect the WiFi basestation to any one free port of the switch. We then set WiFi credential for connecting WiFi devices to the basestation. In this way we can provide internet service from one location to another location kilometers away wirelessly.
How to login to mirkrotik router/switch?
To login mikrotik router we can download, install and use WinBox. Once this application is opened it will show the connected router or switches using MAC address. Both wireless and LAN cable connection to the router is supported. For wireless first WiFi access is required.
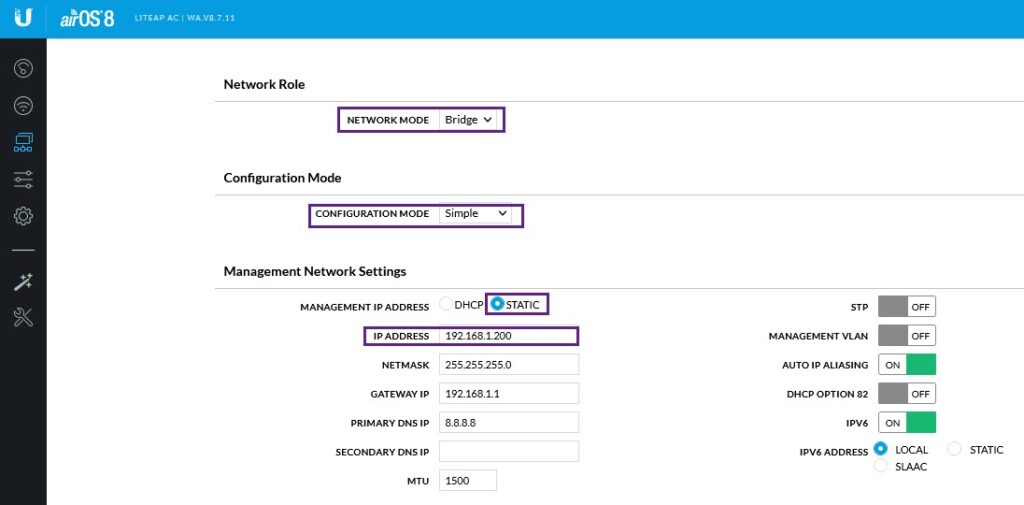
How to login to Ubiquity LiteAP?
To login to LiteAP AC, we can either use wifi wireless access or use LAN cable to the router which is bridged with the eth1 interface which is connected to the LiteAP. In this case, eth0, eth1 and eth7 interfaces of the router were bridged, so connecting PC to the eth7 with LAN cable we can access the LiteAP. Configure the LAN PC IP in the range 192.168.1.x and then typ1 192.168.1.200 into the browser. Normally we would have typed 192.168.1.20 in order to access Ubiquity radios such as LiteAP but in this case, the LiteAP IP was changed previously from default 192.168.1.20 to 192.168.1.200. Also the default username and password for login is ubnt but this has also been changed.
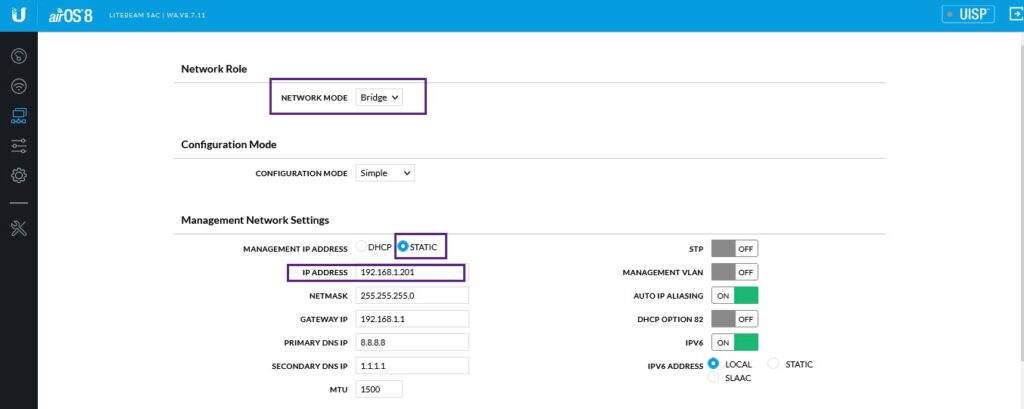
How to login to Ubiquity LiteBeam?
The login is similar to the LiteAP but with IP address 192.168.1.201 and as for LiteAP, the LiteBeam login default IP address is 192.168.1.20 but it was changed to IP 192.168.1.201.
How to login to Ruijie RAP6260(G) WiFi 6 basestation?
Couple of methods is suggested by the manufacturer. The first is to use QR code which you will find in the manual. Now this will lead you to install mobile application that can be used to login and configure the basestation. Another way to use the cloud application is to search for Ruijie cloud app in google play store, download and install it. Similarly if you are connected via wifi and connected as shown in the diagram above, you can directly type in the IP http://10.44.77.253 to login into the Ruijie basestation. The following shows ruijie login page.
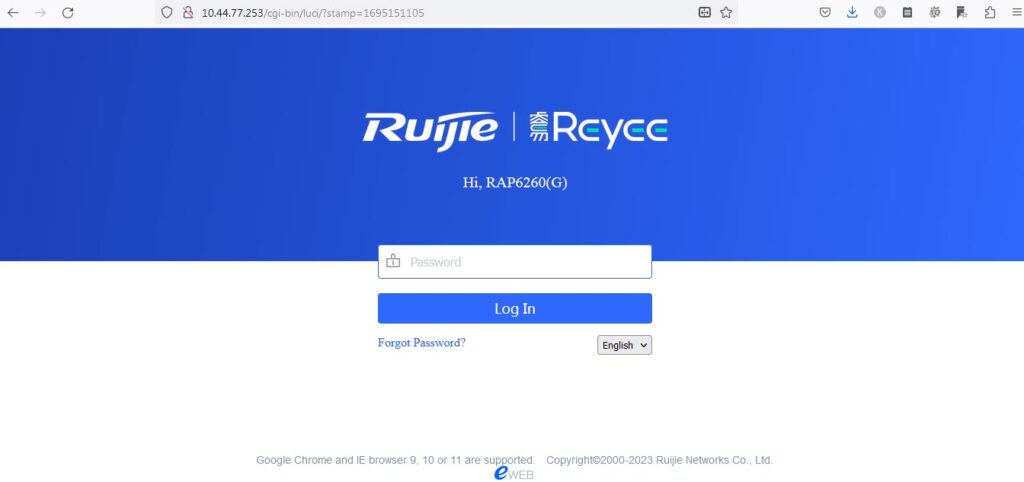
The default password is admin.
How to login to TPLink ADSL2+ router?
The default login address of the TPLink ADSL2+ router is https://192.168.1.1 but first we have to disconnect the internet LAN cable from the TPLink router port. If not the https://192.168.1.1 will the the default gateway which is GPON router. The default username and password is admin.
With this network and settings I was able to get WiFi internet connectivity from the WiFi basestation, from the TP-Link modem. Hence the settings should be correctly configured. The wireless link between the LiteAP to the LiteBeam can also be monitored as shown below.